Hi there, Thanks so much for stopping by. I did this tutorial up a couple of years ago but I just really wanted to share it again......It's such a fun and easy way to decorate Easter Eggs (I would just make sure to give the kids gloves to wear).
The supplies needed are as follows:
- eggs (I suggest using blown out eggs so you get longer use of them) - 2 or 3 colors of alcohol inks (I used Espresso, Raisin, Pesto and Butterscotch)
- 1 or 2 mixative colors ( I used Copper and Pearl)
- alcohol blending solution
- Ranger applicator tool and replacement felts
- optional: rubber gloves, pair of kitchen tongs
Instructions:
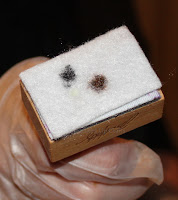
1. Apply a new replacement felt to your applicator tool; add 2 drops of color to the felt and lightly dab onto the egg; continue to dab color onto your egg until you are satisfies with the coverage. (You may need to add more ink to you felt as it will evaporate; I just added the same colors to the same spots on the applicator felt and then continued to dab the egg).
2. Replace the felt on your applicator (you may use the used felt with similar colors once it is completely dry).
 3. Apply the same 2 colors to your felt as you used in step 1; apply one other color as well as a drop of metallic mixative; Continue to dab onto your egg until satisfied with the coverage.
4. Replace the applicator felt.
5. Now add 1 color that you used in step 1 as well as a small amount of the mixative color; Add a very small amount of the alcohol blending solution to the applicator felt as well; As in previous steps continue to dab the egg until you are happy with the coverage.
6. Let Dry and there you have it :)
Just remember to have some fun and experiment...... there are no mistakes, only creations!
Thanks so much for stopping by and I really hope you enjoyed the tutorial. Please be sure to leave us a comment letting us know where we did good and also areas that you would like to see improvement.
Take Care and Have a super Easter!


No comments:
Post a Comment